Table of Contents
Cloning New Rooms
This guide will teach you how to add rooms to your hack via cloning existing rooms. This can be useful for a number of purposes, with the most obvious being adding new rooms means you aren't limited to the existing rooms in the ROM. This allows for some freedom of design, knowing you can add in some extra rooms if your design requires it. With a little foresight, you can use this to copy rooms with certain specifics to save time and repointing later.
Things you will need:
- SMILE. [I'm using SMILE 2.5 for this]
- HEX Editor
- Knowledge of banks, hex editing, and repointing
- This is based off of an unheadered ROM
What you'll accomplish following this guide:
- Finding a room to copy
- Using SMILE to locate where and discover how much data to copy
- Using a hex editor to copy the room you've selected
- Using a hex editor to paste the new room in your ROM
- Adjusting SMILE's documents to recognize the new room header
- Going over what needs to be repointed
In order to be able to follow along with this guide, you should be very comfortable with SMILE and your hex editor. If this is your first foray into cloning a new room, things may seem a little complicated at first. Don't worry, follow the steps, and soon you'll be cloning rooms without a problem. Let's get started!
Step 1 - Choosing Your Room
First thing to do is to find a room you want to copy. There are a few things in play here that may help you decide which one to copy. Initial thing to consider is the FX1. The reason for this is that you if you know what FX1 you want in your room, such as fog, water, fireflea, ect., you can copy a room that already has that FX1, and this will save you repointing your FX1 later.
Second thing is room size. If you copy a room with the same dimensions you want for your new room, this will save a little bit of work later as well since you won't have to adjust the room properties in SMILE.
Third thing to consider is if you want another roomstate. You can add a roomstate later if you want, but you could clone a room with the right roomstate event trigger and save some work down the road here.
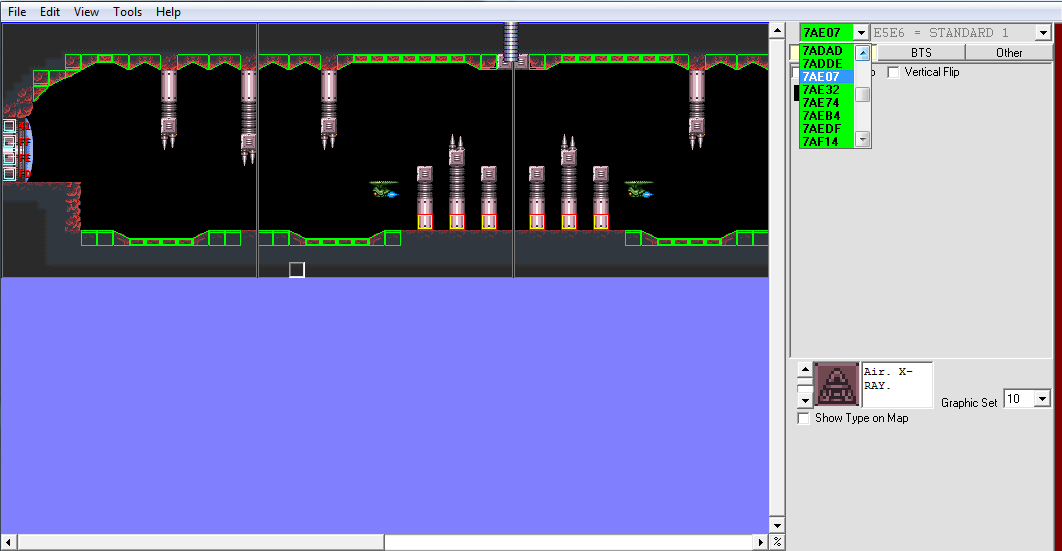
For my example, I am going to use room 7AE07 from SMILE's dropdown list. I need a new hallway to connect some areas together, and the 1*4 dimensions fit what I need.
Once you find your room, it is time to move onto the next step, actually making the clone room.
Step 2 - Making the Clone Room
Now is when we need to get some information from SMILE and then turn to our handy hex editor. So, the first part we already have in hand, our room header from SMILE's drop-down list. Since I have chosen room 7AE07, I know where to begin looking in the hex editor. We need one more piece of information before we jump into the hex editor however.
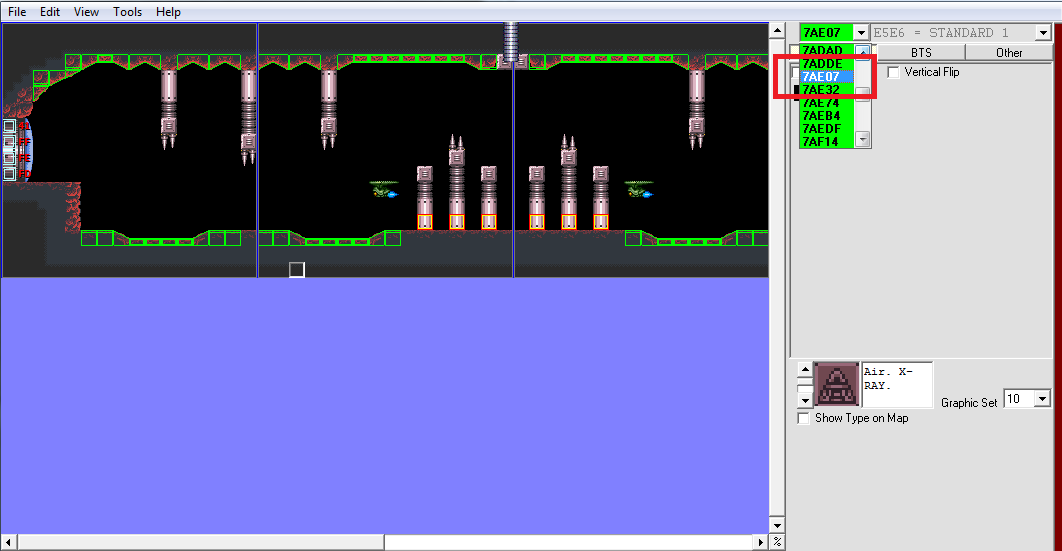
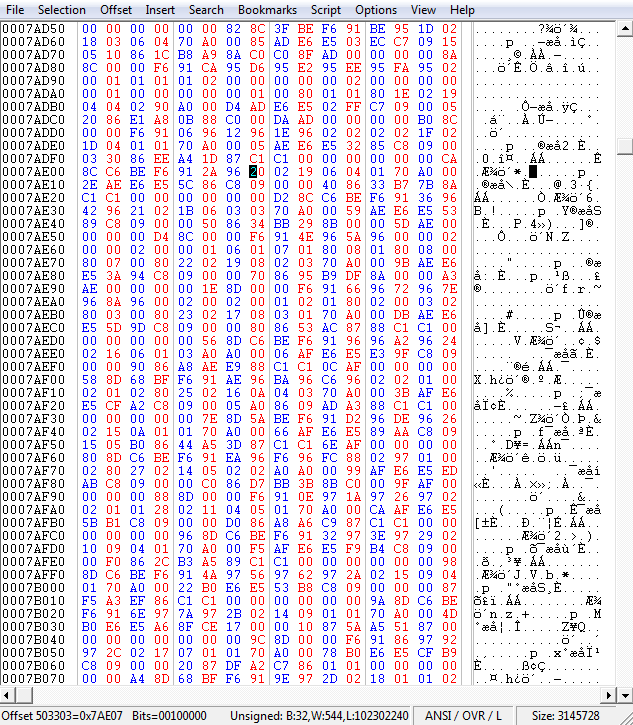
In the picture, I highlighted the surrounding room headers. We only need the one directly beneath our room however, as this tells us where the next room begins in the ROM, so now we know which byte to stop at. So now we need to open our hex editor and jump to the beginning of our room in the ROM. For this, simply do a jump-to command, and enter 7AE07. This will jump you right to the beginning of the room. From here, you will need to select and copy the bytes all the way up until the next room header begins.
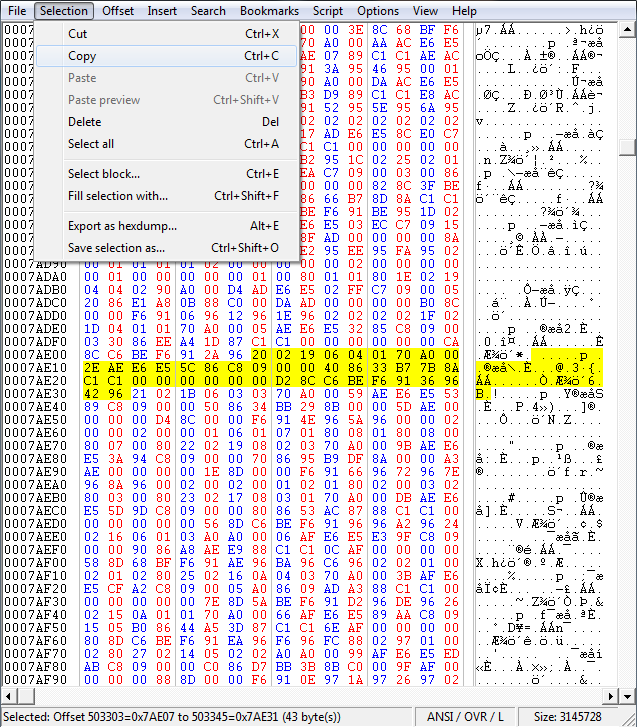
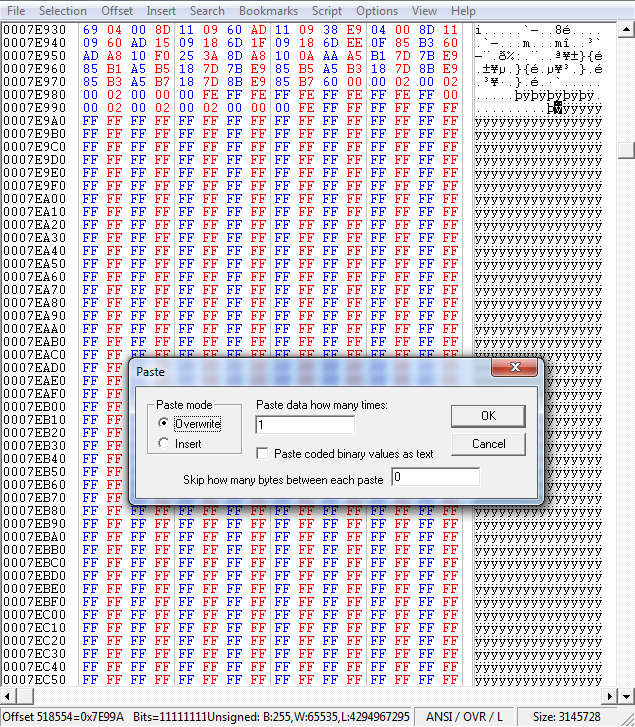
You can see from the image that I've copied the data from 7AE07 until the byte before the next room header, 7AE32 that we got from the drop-down list in SMILE. In total, we have copied 43 bytes here. The next step is to find free space in the same bank to paste our copied room. The bank runs from 78000 - 7FFFF. On a clean ROM, the closest free space is going to be located at 7E99A. Our next step is to note that location, or the location of wherever you decided to paste your new room, and save the hex editor. (Make sure to overwrite the data and not insert the data.)
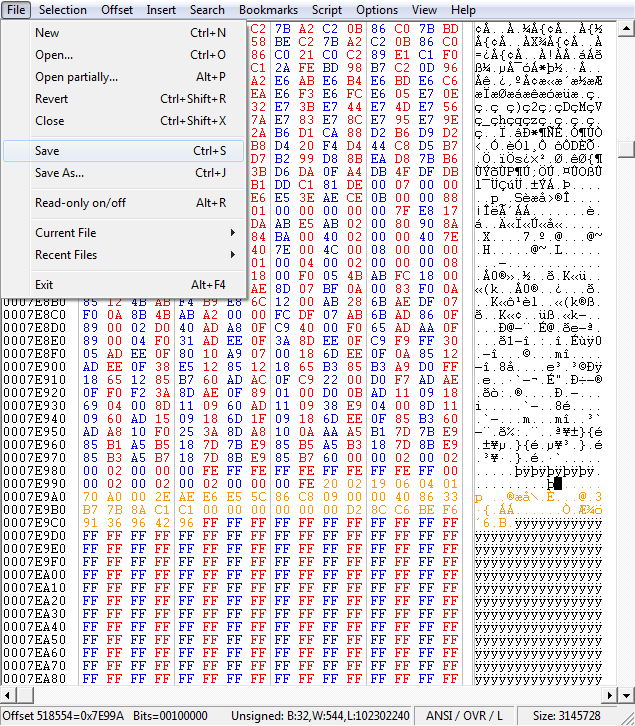
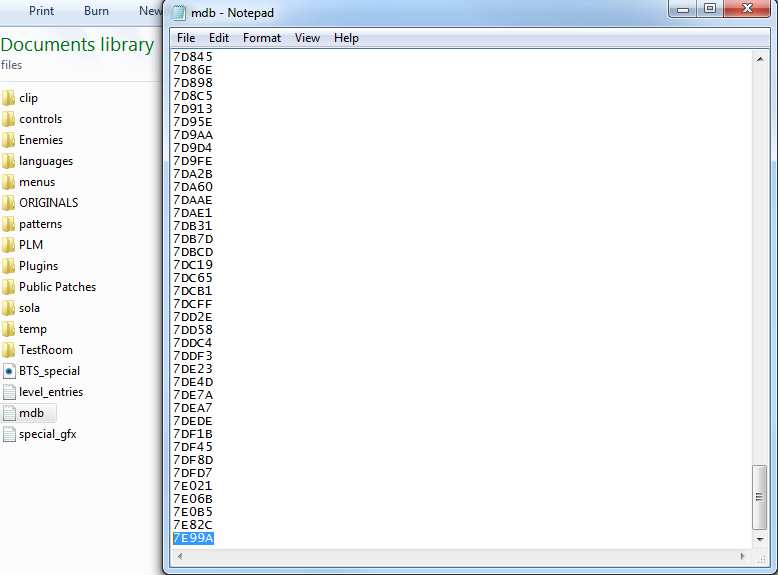
Now the ROM has a new cloned room at location 7E99A. In your case, you might need to paste it elsewhere, but it will be fine as long as you keep it in the same bank. Now we need to make SMILE recognize the room so we can open and edit it further. In order to do this we need to add in our new room header into SMILE's “mdb” text doc. For this, simply go into the “Files” folder, and the doc will be in there. When you open it up, you'll see all the room headers listed. Scroll to the bottom of the document, and insert your new room header. In our tutorial, that will be 7E99A. Save the doc, and close. Now we have a new room header in SMILE!
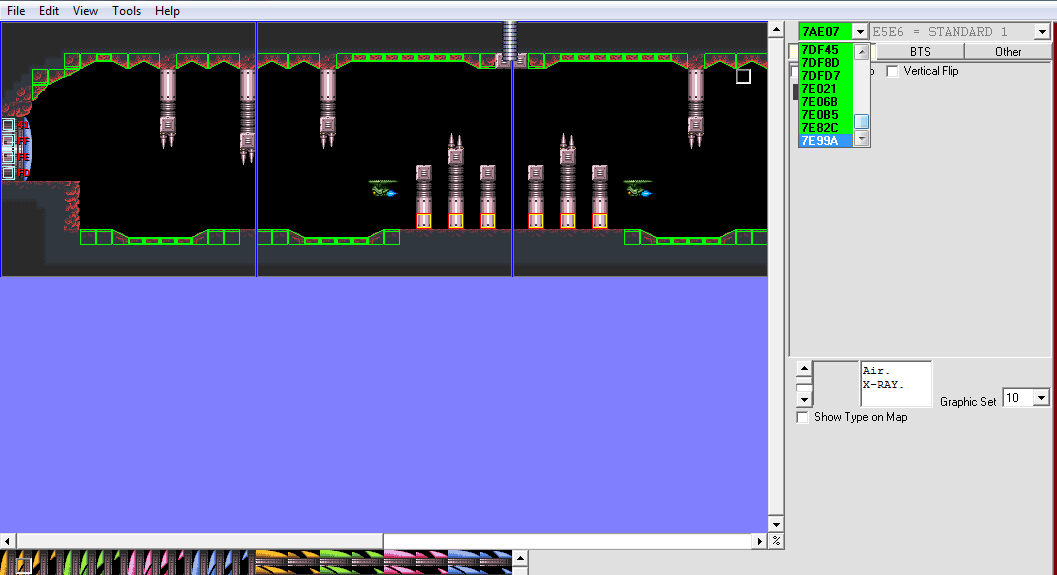
NOTE: You may need to close SMILE and open the ROM again for the room header to update in the drop-down list.
Step 3 - Repointing and Preparing our Cloned Room
When you open your cloned room, you will see everything about it is the exact same as the original. Now we need to do some work to get it to the point where we can fully edit the room with SMILE. Since it is a cloned room, it shares every pointer with the original, and changing something in the clone room will cause the original room to show the same change. You can freely change the music in the room without affecting the original, and you can change the tileset used, but that's about it. Let's get a list of the things we will need to repoint. Red items will absolutely need repointed. Yellow items can potentially be left the same, but you're likely going to repoint them as well.
- Level Data
- FX1
- Enemy Pop/Allowed
- Enemy Set
- Scroll
- PLM
- BG_Data
- Door Out
Level Data: This needs to be repointed first, otherwise you won't be able to change the design of the room at all.
FX1: If you copied a room with the same FX1 affect you desire for your new room, you can leave it the same. Otherwise repoint it to freespace or use a pointer from a room with the FX1 you desire for your new cloned room.
Enemy Pop/Allow - Enemy Set: These go hand-in-hand. It may be possible to leave these the same if the enemies work in both rooms. But moving any enemy in the cloned room will move it in the original room.
Scroll: If you keep the same room dimensions, you'll likely be able to keep the same scroll pointer. If you want to change the room dimensions or add in a hidden scroll section, this will need repointed.
PLM: Depending on if there are any PLMs in the original room, you will need to change this. If there are no PLMs, then it is fine to leave this one the same.
BG_Data: This is simply if you change the tileset and want a different BG. If this is blank and you want to build your own layer 2 BG, then set the pointer appropriately.
Door Out: This needs changed, otherwise both rooms will be stuck with one set of door connections.
Once you've finished with these, you've got a brand new cloned room to build with! (NOTE: If you cloned a room with multiple roomstates, you'll need to change the pointers for each roomstate.) There are a lot of rooms in the original, and the likelihood is you won't be making a hack big enough to need to clone new rooms, but if the need arises, I hope this guide helps explain the details of how and why. Happy hacking!
Original document by MetroidMst


